In this post I would like to show you how to control the APU (APU Master Switch, APU Start, APU Bleed) with the Switch 40 / 41 on your Honeycomb Bravo Quadrant Throttle. Of course you are welcome to use a different button or setup, it’s just for demonstration. For the following setup you need the following:
- The Microsoft Flight Simulator 2020 (subject to a fee), can be purchased e.g. at Amazon
- A Honeycomb Bravo Throttle Quadrant (subject to a fee), can be bought at Amazon
- Den FlyByWire A32NX (free), download FlyByWire Simulations
- Spad.Next (fee required), download/buyable from Spad.Next
- Better Bravo Lights (free), Download via Flightsim.to or Github website
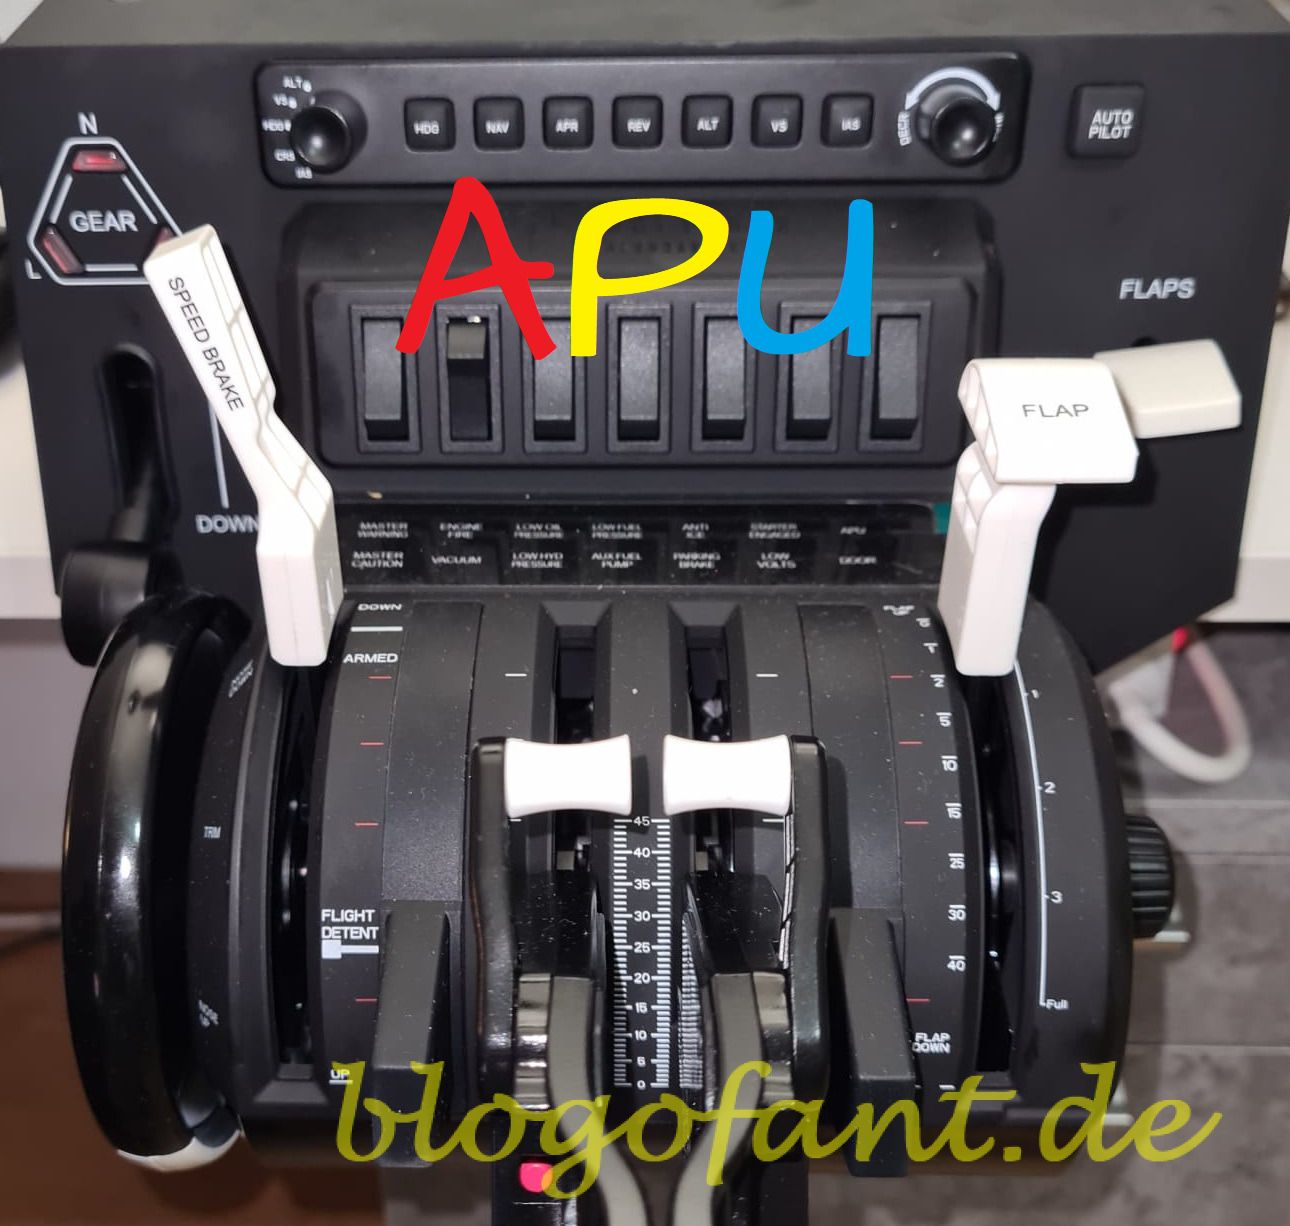
Switch for APU (APU Master SW, APU Start, APU Bleed)
The APU consists of the following components:
- APU Master Switch: Basic switch to activate the APU
- APU Starter: Like the ignition on a car, must once pressed so that the APU starts should, according to the manufacturer, only be pressed approx. 3 seconds after activating the APU Master Switch
- APU Bleed: Provides for the climate on the ground as well as necessary to start the engines
In this setup, I turn all three components on and off one at a time. If you want to use your own switch for the bleed or operate it manually, you can simply delete this part of the configuration.
In order to be able to switch the components of the AUP mentioned above, it requires the variables A32NX_OVHD_APU_MASTER_SW_PB_IS_ON with the parameter (0 = OFF, 1 = ON), A32NX_OVHD_APU_START_PB_IS_ON with the parameter (0 = OFF, 1 = ON / Start) and A32NX__OVHD_PNEU_APU_BLEED_PB_IS_ON with the parameter (0 = OFF, 1 = ON). An event is triggered by Spad.Next via the LVAR interface (similar to a keystroke).
The switches should trigger with a release event, i.e. as soon as you flip the button. Of course, you can also make a configuration so that the triggering takes place as soon as the buttons are pressed (short press). But then you have to swap the logic for button 40 and button 41.
Important information for the Bleed
The APU power generator and the bleed are only available about a minute after switching on the starter. First the APU has to be started up slowly and it takes time for the system to work. For this reason, the bleed should only be switched on when AVAIL appears.
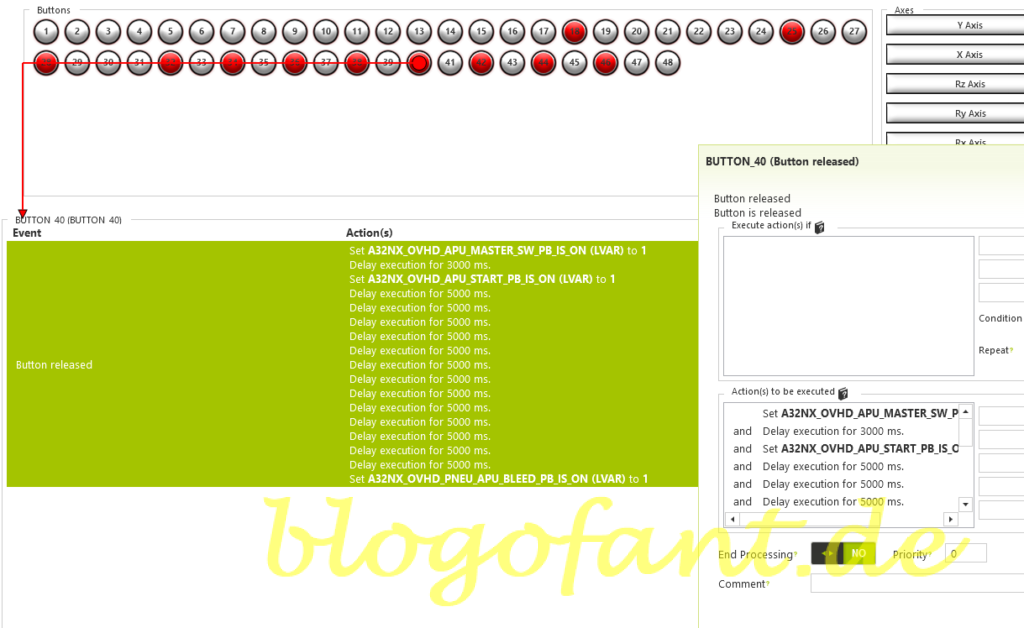
Button 40 Configuration (Release Event), APU ON
Note that this is a button release event. The configuration is a bit more complex because you have to enter a lot of pause values. First you set the LVAR A32NX_OVHD_APU_MASTER_SW_PB_IS_ON to the parameter 1. This activates the APU master switch. Now you should wait 3 seconds (Delay 3 seconds). You can then operate the starter. This happens with the LVAR A32NX_OVHD_APU_START_PB_IS_ON and the parameter 1. Now the APU is started up – this can and will take time. For this reason we need several pauses (maximum pause time is 5 seconds). I have inserted 13 breaks of 5 seconds each, so a total time of 65 seconds. The bleed can then be switched on. This happens with the LVAR A32NX__OVHD_PNEU_APU_BLEED_PB_IS_ON and the parameter 1.
Note that the maximum delay value (pause value) is 5 seconds (= 5000ms). You can also enter a value of 60000 (60 seconds), but the program will only pause for 5 seconds. For this reason it is necessary to introduce so many delays with 5000ms.

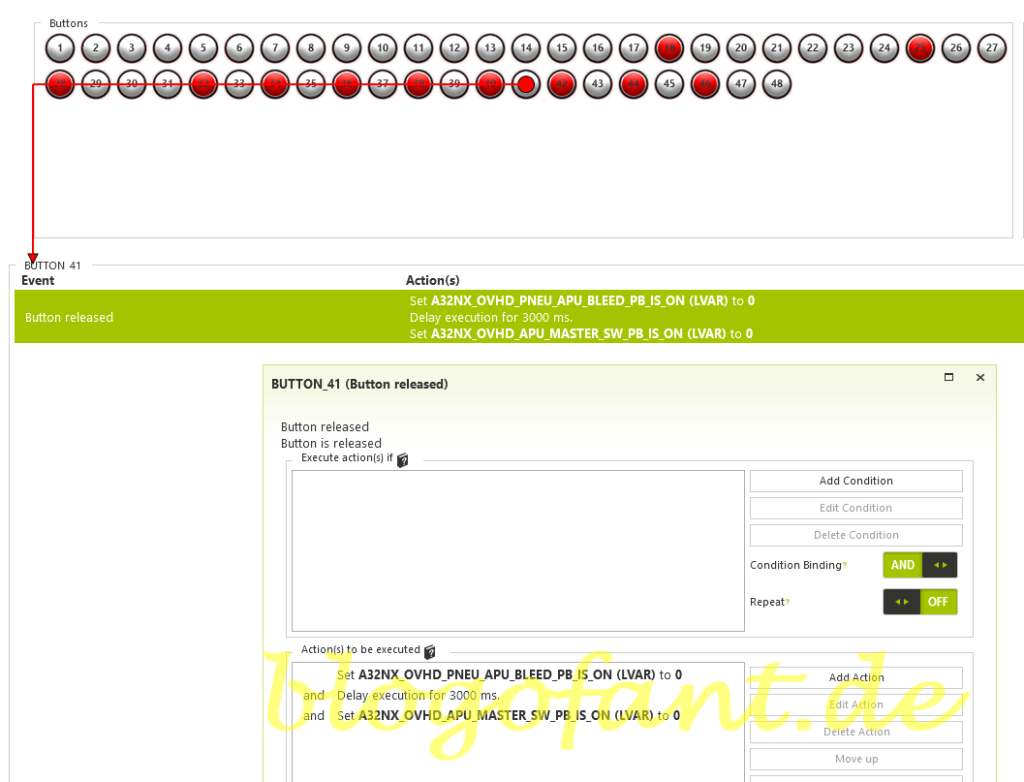
Button 41 Configuration (Release Event), APU OFF
Note that this is a button release event. The configuration is quite simple, because you only have to switch off the bleed and the power switch of the APU. With the LVAR A32NX__OVHD_PNEU_APU_BLEED_PB_IS_ON with the parameter 0, the APU bleed is deactivated. A pause of 3000ms (3 seconds) is then introduced. With the LVAR A32NX_OVHD_APU_MASTER_SW_PB_IS_ON and the parameter 0 you switch off the APU.
Note that the APU lags for a minute or two and during this time there is still AVAIL, for example for electricity. For this reason, the LED light for the APU will continue to shine for one to two minutes after switching off.

More configurations
- Configure the autopilot
- Configuration for SeatBelts
- Configuration for AutoBrakes
- Configuration for the APU
- Configure A/THR
- Configure for taxi lights
- Configure for landing lights
- Configuring flaps & spoilers
- Configuration in MSFS
- To the overview page of the configuration of the A32NX
- Key Map / Button Map Honeycomb Bravo
More about the Honeycomb Bravo Throttle Quadrant
More about the Honeycomb Bravo Throttle Quadrant can be found on the Honeycomb Bravo Throttle Quadrant Overview Page, the Configuration page of the Honeycomb Bravo Throttle Quadrant for many other aircraft and the Honeycomb Bravo Throttle Quadrant Test and Recommendation.


1 thought on “Honeycomb Bravo – FBW A32NX – APU (Button 40 / 41)”
Comments are closed.